As promised in my first income report, here is another post in the blogging tips series. This time we are talking about photo editing!
“How do you edit your photos?” is probably the question I get asked most these days. So instead of answering all of your messages separately, I figured I should make it into a blog post! Photo editing was what I struggled with the most when I first started, so I really want to share everything I have learned over the last few years with all of you. Keep in mind that I’m not a professional photographer by any means, this is just how I like to do it!
After I finally found my own editing style I managed to grow my Instagram from 3k to 20k in a little over three months. So it’s definitely worth spending some time playing around with editing.
🔥 If you would like to take a look at my popular Lightroom preset collection, check out the Travel Creator Toolkit that now also includes the presets along with lots of super helpful templates!!
Article overview
My affordable camera gear
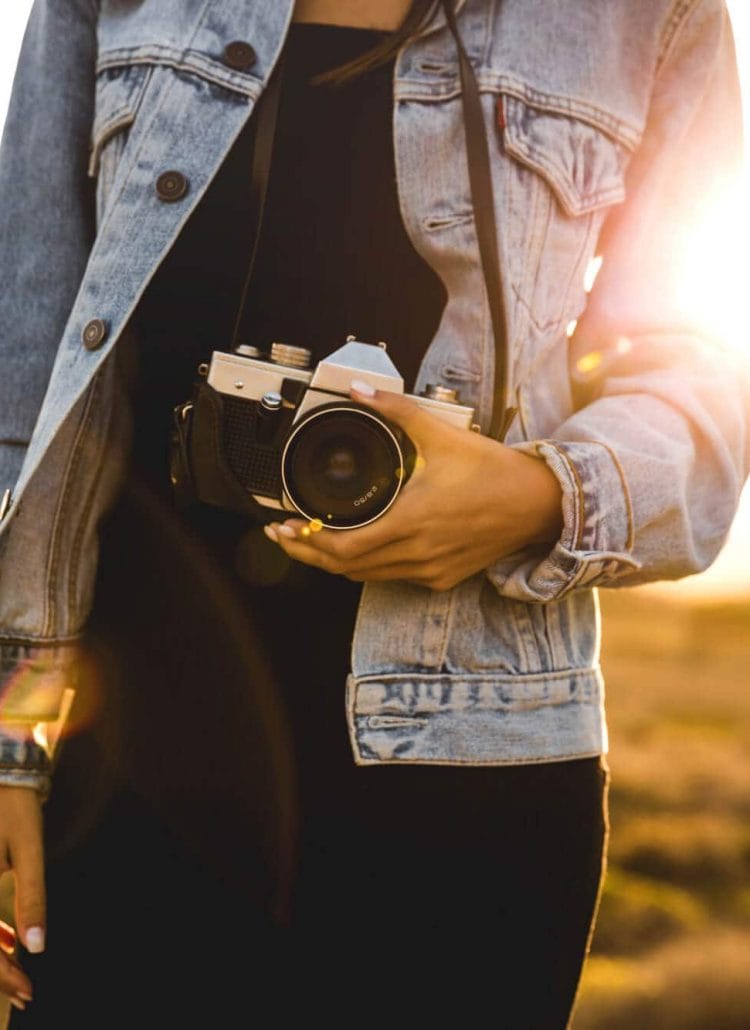
But first things first, let’s take a look at my camera gear. To be honest, it’s nothing that fancy, but I never use my phone for my Instagram feed, only for my story. I spent quite some time researching mirrorless cameras before I decided on the Olympus om-d e-m10, and I couldn’t be happier with my choice! It’s so easy to use and the Olympus app connects the camera to your phone so you can use it as a remote. So helpful if it’s only you and your tripod trying to get the shot! And it doesn’t hurt that it is so pretty to look at, a black and silver retro design.
For lenses, I sometimes use the 14-42mm that came with the camera, but for the most part, I use my fixed f1.8 25mm which creates the most stunning blurry backgrounds. And if you’re a solo traveler you should definitely get yourself this Gorillapod. You don’t want to drag around a large tripod everywhere, so a Gorillapod is your best friend!
Related post: From beginner to full-time travel content creator with $800 camera gear
File format & editing software
I always shoot in RAW which means that the camera records just the image data onto the memory card so you’ll have to “develop” the photo yourself. When shooting in JPEG, image information is compressed and lost because the camera processes the photo for you.
Shooting in RAW will give you the best possible quality, but because of the uncompressed information, RAW files can be 3 times larger than JPEG. It will take a bit more time and effort, but I’m guessing all of you who read this post are going to edit your photos anyway, so shooting in RAW is the way to go. After you have edited your photo in editing software like Lightroom, you can export it as a JPEG file so that you’ll be able to share it on social media and your blog.
The next step is to go through your photos and choose only the best, so you don’t have to store them all. Whenever I find a cool location I shoot between 10 and 100 photos at each spot, but I only save the 3-5 best in Dropbox (Here are 5 ways to backup your photos). That way I only end up with one folder containing the top photos from each location, which I then import to Lightroom.
If you don’t already have Lightroom I highly recommend you get it now. Before you start editing, take a look at this 15-minute Lightroom tutorial for beginners. It will give you a clear overview of what Lightroom is, as well as some useful tips and tricks.
How I edit my photos in Lightroom

Level & crop
One of my personal pet peeves in photography is when the horizon in a photo isn’t level. It’s so easy to fix, so the first thing I always do is straighten and crop the photo. Just select the crop and straighten tool and hover the mouse outside one of the corners until the double arrow appears.
Click and drag the cursor up or down until the grid is aligned with your horizon. This is also a good chance to cut out anything you don’t like in the photo by cropping it. As you can see above, by straightening and cropping the photo I got rid of my very unattractive elbow and made the overall look much more pleasing!
If you want to create a custom size, click the lock button and you’ll be able to move around the dimensions as you please.
You might also like: How to create a media kit as a travel blogger/content creator

Presets
After I’ve made sure the photo is level and the right size, I adjust the exposure and then apply one of my presets. These are presets that I have created over the past year after experimenting a lot with different editing styles.
Presets are absolutely essential if you are just starting out and don’t want to waste hours trying to figure out how to get your photos to look like what you imagine in your mind. Or maybe you want to make your Instagram look more like someone else’s feed you like. I mean, you should never copy exactly what someone else is doing, but it’s totally ok to let their style inspire you.
Or you can sign up for the Travel Creator Club above and receive my Ocean Gold preset and one of my pitch templates for free. Remember to use #SunshineSeekerPresets when sharing photos edited with this preset on Instagram. I will share my favorites on my story 🙂
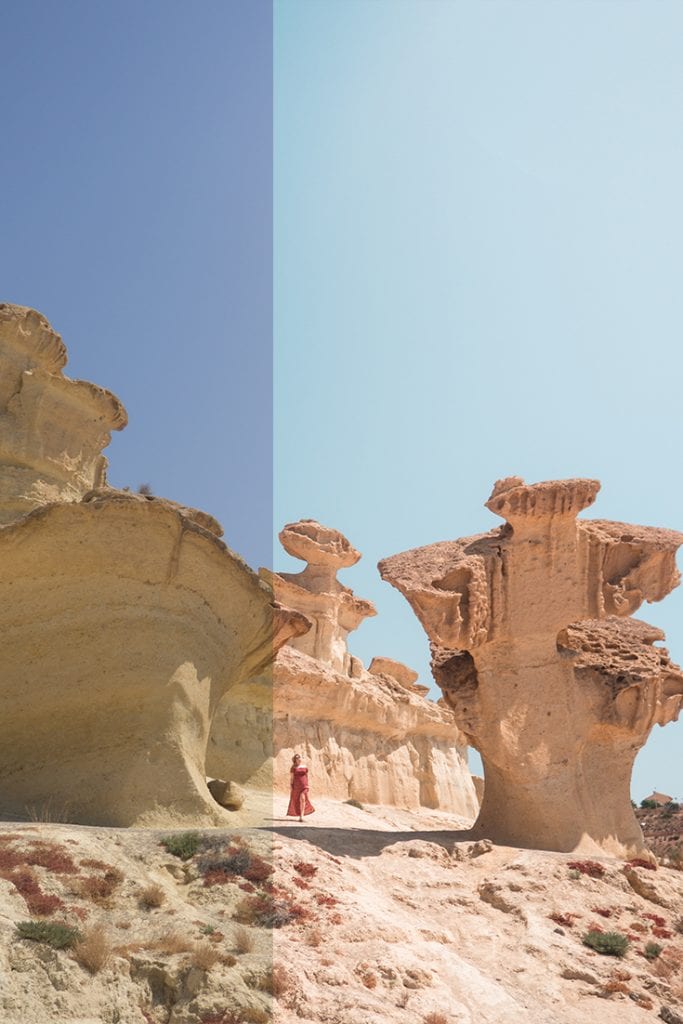
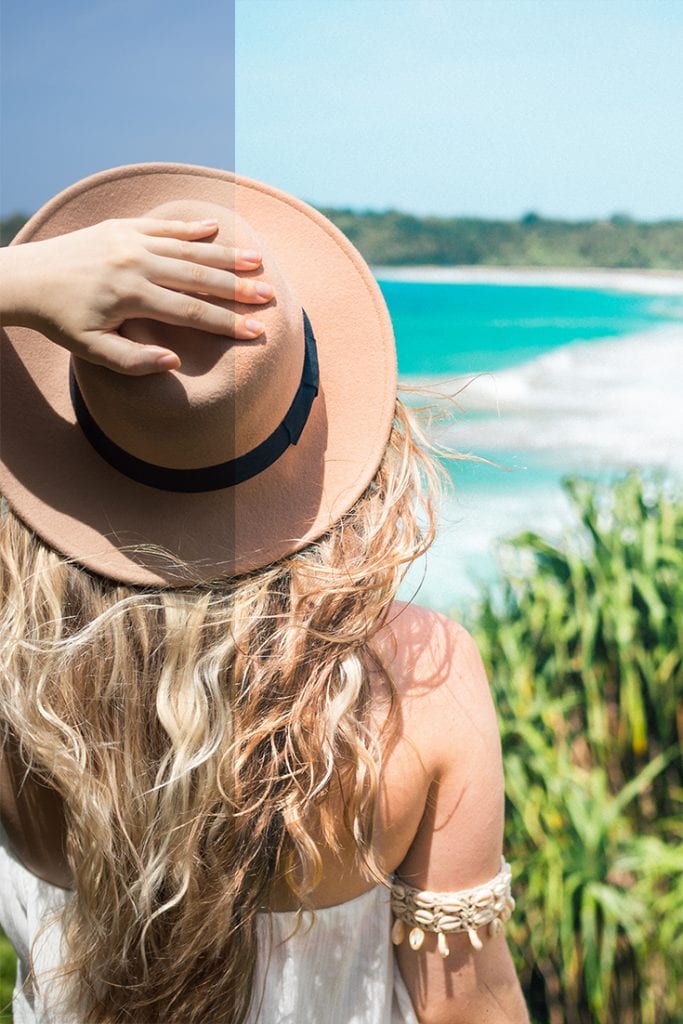
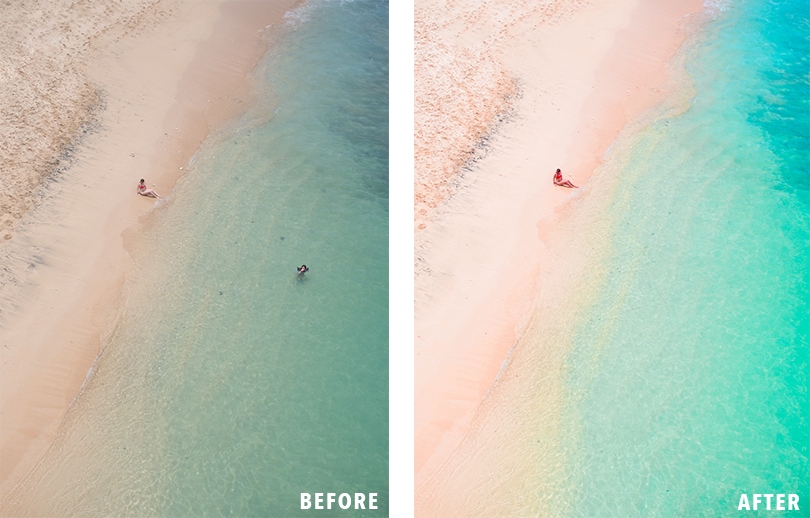
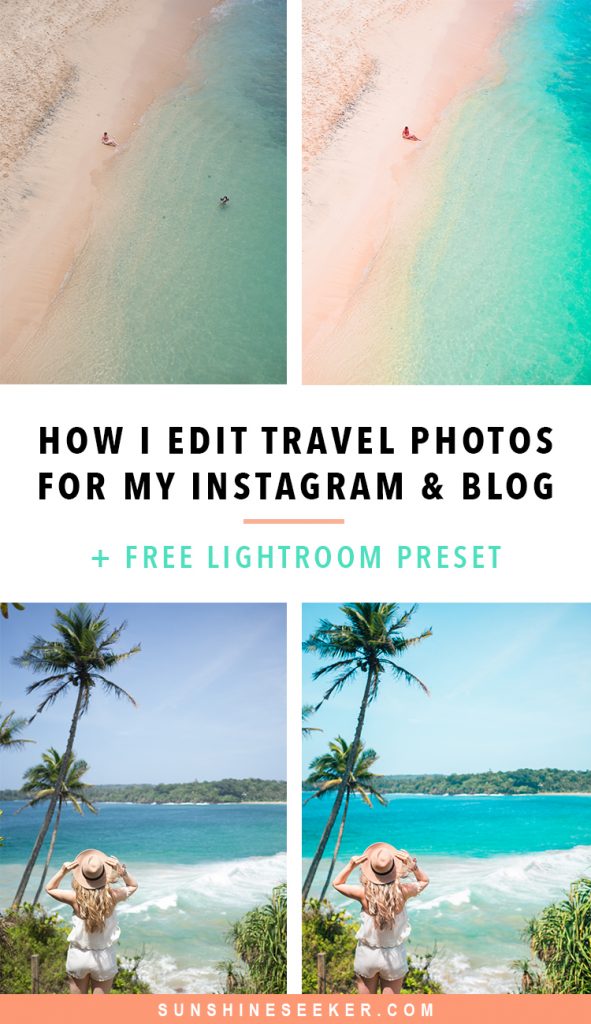
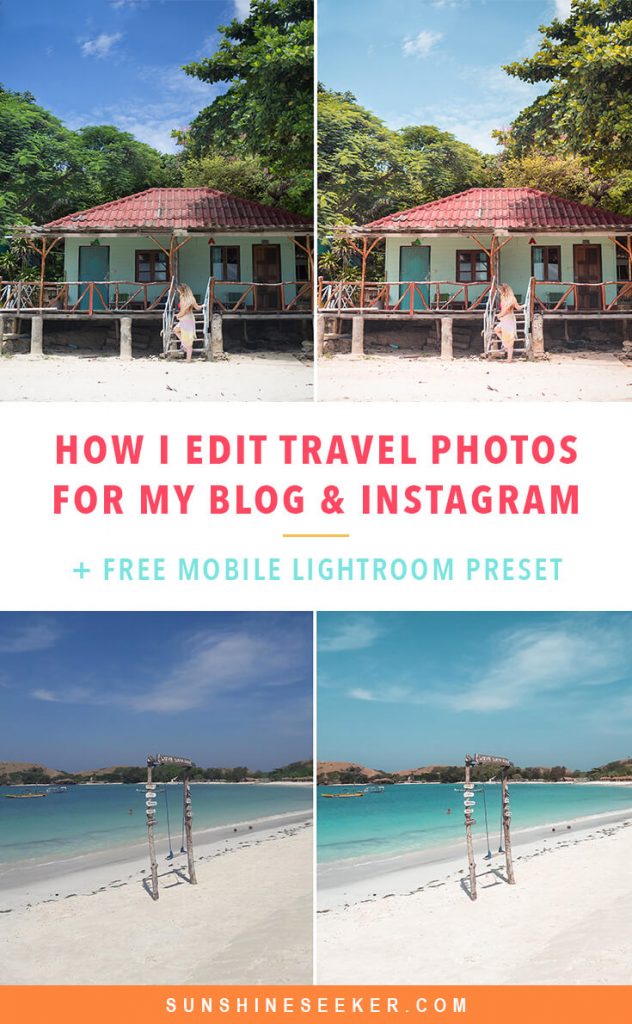
My editing style is light, pastel-colored photos with as few shadows and blacks as possible. I want my Instagram feed and blog to make people happy and to me, colors equal happiness. The “Ocean Gold” preset works especially well with blues, greens and oranges.
So for those of you lucky enough to actually have some pigments in your skin, this preset will enhance your tan. I like the retro look so this preset also includes some grain, so if you just want a crisp and clean image, remember to remove the grain.
How to install Lightroom presets
If you have updated to the 2018 version of Lightroom you can just head to the presets panel inside develop mode and click on the “+” then “import presets”. Locate the presets you’ve downloaded and hit “import”. Done!
For older versions of Lightroom:
Open Lightroom > go to preferences > click on presets then the show Lightroom presets folder
A new window will open > click on Lightroom > then develop presets
Drag the Ocean Gold preset into the develop presets folder > restart Lightroom
Make adjustments
The most important thing to remember is that no preset will work for all photos, making small tweaks are almost always necessary.
Shadows and highlights are the two sliders I usually adjust the most. Highlights are super useful for bringing overexposed areas down in brightness. Like the sky is you’re shooting on a sunny day. As I mentioned above I love light photos which means I also lift the shadows quite a bit, usually to about +50-60. Just be aware that if you lift the shadows too much it can result in a lot of noise and hues of green and purple. Download the preset and see exactly how I do it!
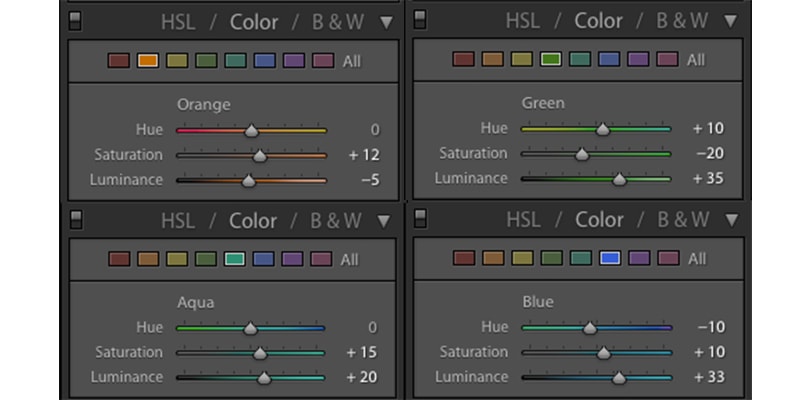
When it comes to colors I like to tweak each color individually instead of enhancing the overall vibrance or saturation. In almost all my photos I like to make blues more turquoise and the greens cooler, as you can see below.
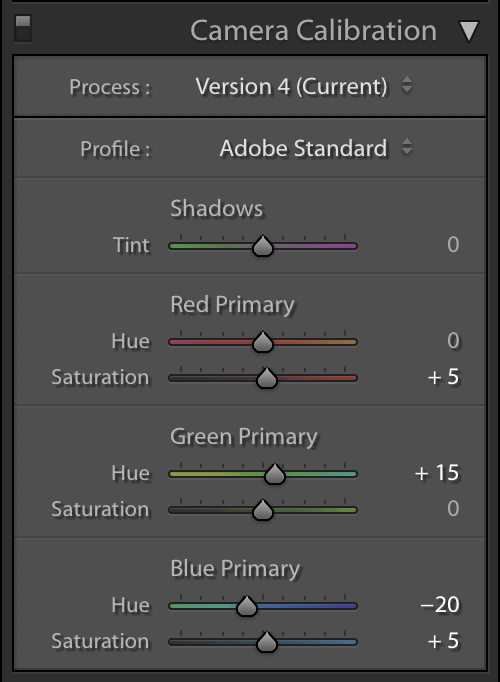
One of the most important tools you have if you want to change the look of your photo is Camera Calibration. The panel is split into a few sections, Process, Camera Profile, Shadow Tint and RGB Primaries. The RGB Primaries section tweaks the overall color mix in your image. Changing greens in the color panel above will target areas of the image that appear green, whereas changing greens here will affect all pixels that contain green in their mix. Don’t be afraid to play with the values here, but do not overdo it! This is how mine usually ends up:
The last thing I do in Lightroom is to remove unwanted objects with the healing tool. More often than not there will be something in your photo that you really don’t want to be there, like a spot on your face or a man in a speedo behind you when doing a selfie on the beach. This is quite easy to remove if the object is surrounded by uniform colors. The healing tool has to replace the area you wish to remove with something else, and this works best when it has an area nearby that looks similar.
A good example is the little girl above that had to float over to me just as my boyfriend got the shot. Seconds later the sun went away so we didn’t get a chance to shoot it again. But because the girl was surrounded by water she was super easy to remove using the healing tool. As you can see I also cleaned up the sand a bit and got rid of some stones in the water.
When you’re happy with the edit, export and transfer the photos to your phone using AirDrop, Dropbox or Bluetooth. On Instagram, I always post vertical photos that are 1080px in width(short edge) and for my blog I make the width the same as my post area.
And that’s it, you’re now ready to post! As you can see, getting the editing right is much more than just snapping a shot with your phone and slapping on an Instagram filter. Haha, I know this might seem like it will take a lot of time but I promise, once you get the hang of it, it will only take a couple of minutes per photo. Presets make all the difference!
I hope you found this post helpful! If you have any more questions just comment below 😀
And remember to pin for later!



Your pictures are really breathtaking, Charlotte! Thanks for sharing your little trick will I am definitely going to try. 😉
Thank you so much, Agness! Happy to hear that 😀
Hi! I want the preset but don’t find how to sign up?
Can you email it to me?
Hi, Rani! Thank you for your interest in my preset. I just added you, so you should have received the email with the link to the download. If you can’t see it, check your junk folder 😉
Hi,
I’d look to try your preset, I have signed up big can’t find the email even in my Junk folder! Could you try and send this to me? ☺️
Thanks,
Claire
Hi Claire. Thank you for letting me know you didn’t get it. Will try to find out what went wrong. I have sent it to you now 😉
Hi! I’ve tried signing up to your mailing list and I think I’m having the same issue as Claire, I’m not getting any kind of confirmation email in my inbox or junk.
I’m new with blogging and your tips are amazing!
Hi Rhi! Thanks for letting me know. I just emailed you 😉
Hi, I’ve signed up for your mailing list and to get the presets and I haven’t received anything yet. Could you email it to me? Thanks so much! ?
Hi Taylor. I don’t know what happened but I’ll email it to you now 😉
Hello! I love this. I signed up but didn’t receive the email. Would you please send it to me?
Thanks!
Thank you for letting me know! I just sent you an email 😉
I also signed up and didn’t receive the email :/ can you please send it to me?
I’m sorry, I just resolved the issue. Check your email 😉
Hello,
I hope you still check this post 🙂 I just signed up – looking forward to see how the preset looks at my vacation pics 🙂
Hi Jack! Thank you for signing up 😀 I really hope you like the preset
Hi! Do you have a mobile version of your Lightroom CC preset?
Yes, the mobile version is now available for download as well. Just sent it to you 😉
Thank you!
Hi there. I received the preset in the email. How do I install them into the lightroom? 🙂
I’ll email you an installation guide 😉
Thanks for sharing the great article I learned a lot about editing by watching the video and reading the tutorial.